Back to Pattern / Course
Hug Blanket (right & left handed)
0% Complete
0/0 Steps
-
get help
-
crochet pattern and chart
view, download & print the pattern -
view, download & print the chart
-
before we start crochetingabout the Hug Blanket3 Steps
-
yarn and tools
-
print the progress worksheet
-
right and left handed online course and video tutorialspart 1: arm crochet up to the end of row 14 Steps
-
part 2: arm crochet up to the end of row 57 Steps
-
part 3: arm crochet up to the end of row 1512 Steps
-
row 6 (left arm)
-
row 7 (right arm)
-
row 8 (left arm)
-
row 9 (right arm)
-
row 10 - last row for Baby Snuggles size (left arm)
-
check the width and height of your crocheting
-
row 11 (right arm)
-
row 12 (left arm)
-
row 13 (right arm)
-
row 14 (left arm)
-
row 15 - last row for Little Snuggles size (right arm)
-
check the width and height of your crocheting
-
row 6 (left arm)
-
part 4: arm crochet up to the end of row 2511 Steps
-
row 16 (left arm)
-
row 17 (right arm)
-
row 18 (left arm)
-
row 19 (right arm)
-
row 20 - last row for Lounge Snuggles size (left arm)
-
check the width and height of your crocheting
-
row 21 (right arm)
-
row 22 (left arm)
-
row 23 (right arm)
-
row 24 - last row for Single and Double Snuggles sizes (left arm)
-
row 25 - last row for Queen and King Snuggles sizes (right arm)
-
row 16 (left arm)
-
part 5: finish off your blanket2 Steps
Part 4,
Step 2
In Progress
the blanket sizes
Part Progress
0% Complete
It’s time to start filling in your Progress Worksheet! Go to “the blanket size I’m making” and fill in the width and height with the info from down below.
The Hug Blanket pattern covers 7 blanket sizes:

The width is measured across the bed (and along the row) and the height is from the base to the head of the bed (and is the measurement of all the rows).
Because of the weight and stretchiness of this blanket, the sizes and gauge are indicators only. It’s handy to measure your Hug Blanket after row 5 to check it’s the width that you want.
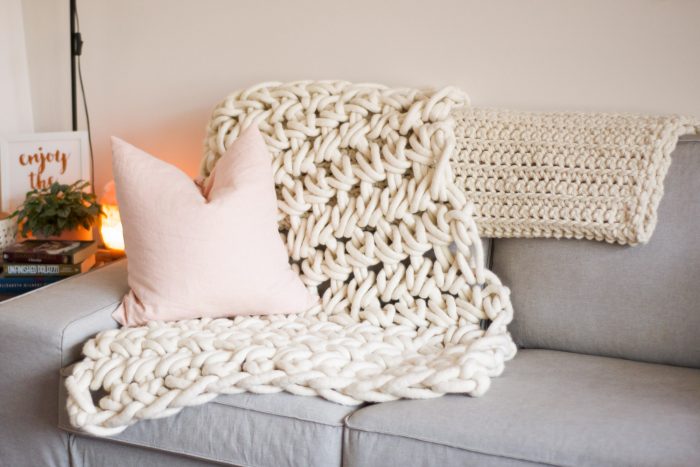
The Hug Blanket below is the Little Snuggles size and it’s made with Natural Homelea Hug.

how to make a different size
Making a different sized Hug Blanket is easy. Here are a few different ways to do it:
- increase or decrease the number of stitches in the foundation chain, or
- increase or decrease the number of rows, or
- change the size of your yarn to change both the width and height.
gauge / tension in the centre
- 4 stitches in 0.35m (14in)
- 5 rows in 0.35m (14in)

